


Move watermelon seedlings to an outdoor bed after the danger of frost has passed, the root zone has warmed and the plants have adjusted gradually to sun and wind. Choose a compact transplant with a few true leaves and roots that hold the growing mix together. If the air is warm for one afternoon but the ground is cold after rain or the forecast calls for chilly nights, keep the seedlings sheltered and wait for a better window.
Choose the day by checking the bed
A watermelon root ball meets the soil well below the sunny surface. Use a thermometer at that depth in the morning and compare several planting spots, especially if one side is shaded or has heavier soil. Around 18 °C is a useful guide to warm outdoor soil. A single reading does not tell you how cold the bed will get over the next few nights, so look at the forecast, recent rain and the trend in your measurements before setting out the plants.
In Ukraine, a raised bed with light soil and shelter from the wind may be ready sooner than a low spot with standing water. In a cool garden or a site that warms slowly, do not assume another grower's date will suit you. Check whether your cultivar can mature within the likely warm period at your site. For next year's batch, work back from that transplant window when you decide when to start watermelon seeds indoors.
Postpone planting if the bed is saturated, even when you have already dug the holes. Soil that sticks to the spade in slabs can compact around the root ball. Check below the surface after rain. If you can choose between a warm bed that drains and a hollow that stays wet, prepare the first site. A successful move depends on conditions around the roots as well as above the leaves.
Check the seedlings and harden them gradually
Pick a short, stocky plant with expanded true leaves. The seed leaves that open first do not count. Two or three true leaves are a useful guide to a transplant that has not outgrown its cell, but also look at the condition of the stem and the root ball. If buying seedlings, check for obvious leaf damage, roots tightly circling the pot or a stem that has become long and fragile. Handle the container as you inspect the plant.
Start in a sheltered patch of shade for a few hours during mild weather. Bring the plants back under protection before temperatures fall. Gradually extend the time outdoors and increase direct light as the seedlings tolerate it. In windy or unusually cold conditions, step back to a gentler exposure. Let excess water drain from each pot, but do not let the root ball dry out to try to toughen the plant. For the rest of the vegetable garden, see the guide to raising and hardening seedlings.
If a cold spell delays your plans
Keep the tray in a bright, sheltered place and space the pots so the leaves receive light. A few roots at a drainage hole do not by themselves call for action. A densely packed root ball that dries out during the day may have outgrown the cell. If you expect a longer delay and can slide the root ball out intact, move it into a roomier container. Mark the cultivar so it can still go into the right space when the weather improves.
Set the seedlings out with the roots intact
- Mark the planting positions on a sunny bed. Follow the spacing for your cultivar and leave access for watering, cover and spreading vines.
- Moisten a dry root ball ahead of time and let the excess drain. Prepare a hole to receive the root ball.
- Squeeze a flexible cell gently and support the root ball from beneath as you slide it out. Avoid pulling on the stem.
- Follow the nursery's guidance on planting depth. Keep the graft union of a grafted watermelon above the finished soil surface.
- Fill around the root ball with loose soil, then water around it. Make sure the water soaks in and does not wash soil away from the stem.
Choose a cloudy spell or work after the strongest sun, provided the evening remains warm. Prepare the holes before lifting a seedling out of its container, so the roots are not waiting in wind or sun. Leave the mix around the roots in place. If a rigid pot traps the plant, cut the container carefully instead of pulling on the stem. Free roots that have grown through the drainage holes before trying to remove the root ball.
Check that the hose reaches the far end of the bed. If one part routinely drains slowly, test an empty hole at that edge and give pooled water time to drain. Choose another planting position if water stays there. Lay out the cultivar labels before you distribute the pots, especially when one variety requires more space. Use the outdoor watermelon bed layout to plan vine direction and paths. Set out empty pots and walk between them before digging to test access.
Check water and shelter during the first days
Inspect the soil inside and just outside the root ball. The mix from the container and the soil in your bed can dry at different rates. If a plant droops in bright sun, look again during a cooler part of the day and check both moisture and the stem base before watering. Repeatedly filling the hole will not repair roots or warm cold soil. Once a fresh, healthy leaf begins to unfold, it is a more useful sign of recovery than the size of leaves the plant already had.
Temporary cover can buffer wind and swings in temperature. Hold it on supports so it does not press against tender leaves. Check the temperature underneath on sunny days, vent if it becomes hot, and remove the cover when conditions settle or the flowers need access for pollinators. If cold soil or a frost forecast makes conditions unsuitable, wait for a safer planting window.
The day after planting, compare plants on the exposed edge with those in the middle. If one side dries sooner, check how the wind and irrigation reach that part of the bed. If every planting hole remains wet, delay further irrigation. Mark a few plants to check again rather than moving them each time you inspect. A note of the transplant date and conditions makes it easier to plan a second batch.
Decide what the bed needs before adding fertilizer
Review the soil test and what has already been added. A section that received compost may differ from the rest of the bed, so note its limits. Drainage, cold soil and transplant damage need their own attention. Begin with checking the soil before choosing a fertilizer and compare the recommended nutrients with the formulation of a suitable product before buying.
Granules for a watermelon bed with a confirmed need
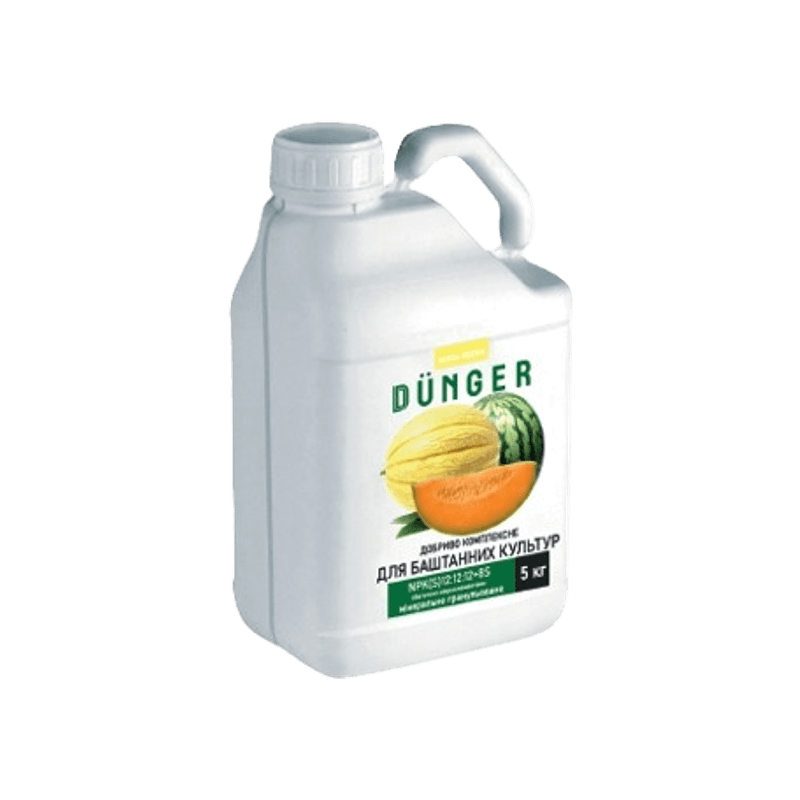
Fertilizer for melon crops granules
If a soil test shows that the outdoor bed needs the nutrients in this formulation, consider the dedicated DÜNGER granules for watermelon. Check the main spring soil application at planting in the complete directions, which calculate the quantity by bed area. Plan any necessary application before you expose the root balls.
Measure the area prepared for watermelons and compare the quantity you need with the 5 kg pack. Check the original pack image and the current price. Keep open ground and greenhouse plans separate because the directions distinguish those conditions.
Frequently asked questions
Check soil temperature at root-ball depth and look at several nights in the forecast. If the weather is turning cold or the bed is saturated, keep seedlings sheltered and check again later.
Move the transplant with its growing mix intact. Support the root ball as you remove it from the cell. Watermelon roots are sensitive to disturbance.
Check moisture inside the root ball and around it. Water when it is beginning to dry. If it remains wet and the plant droops, inspect the drainage and stem before adding water.


