


Plant bulb onions in spring when the chosen planting material and the bed are ready. Onion sets, direct-sown seed and transplants are three different starting points, so they should not share one automatic planting date or depth. Begin by deciding whether you want green leaves, summer bulbs for immediate use or onions suitable for storage. Then choose a cultivar and method that fit your local season.
Separate spring planting from overwintering
This guide concerns ordinary bulb onions planted in spring. It is different from placing suitable planting material into a bed before winter. If that is your task, use the guide to planting winter onions. Changing the season involves more than moving the same instructions to another month, because material, establishment and exposure differ.
Use November to compare varieties and plan supplies for spring. In Ukraine, southern gardens, northern areas and cooler foothill sites do not become workable simultaneously. Even neighbouring beds can differ where one remains wet and another drains. Use the actual bed and forecast rather than somebody else's calendar photograph, and wait for suitable spring conditions before starting this planting.
Choose seed, sets or transplants deliberately
Sets are small bulbs grown previously and planted again. They are convenient to handle, but their size, cultivar and storage history matter. Seed offers a wider choice of named varieties and requires attention to germination and early weed control. Transplants are living young plants, either purchased or raised under suitable conditions before planting outdoors.
Compare the time and facilities each route needs. Someone able to monitor trays and provide good light may raise transplants, while another gardener may prefer labelled sets. Direct sowing requires a suitable seedbed and a cultivar that can complete its development in the available season. Do not assume that every bag sold simply as onion produces the same crop by the same route.
Check the cultivar and intended harvest
Onion bulb formation responds to day length, and cultivars differ in that response. Choose material recommended for your region and intended production method. A variety selected for a different latitude cannot be made suitable merely by adding fertilizer. Ask about the cultivar name and local use when a seller offers unlabelled sets or transplants.
Storage, colour and flavour descriptions are separate from seasonal adaptation. Green onions and full-size storage bulbs also require different space and harvest decisions. Write the purpose on your order or bed plan so purchases do not become mixed. Keep seed packets and cultivar labels until harvest; they help explain whether a disappointing result concerned the method, the variety or the conditions.
Test whether the bed is ready to work
Choose a sunny position with soil that drains well. Do not work ground that is frozen or saturated and sticks into a smeared mass. Inspect below the dry-looking surface. A bed can appear ready from the path while remaining wet where roots will grow. Improve access to drainage problems rather than forcing planting because a familiar date has arrived.
The guide to assessing soil before fertilizing helps organise texture, moisture and nutrient checks. Account for previous compost and fertilizer, especially in a bed already prepared for another crop. A soil analysis can help determine nutrient needs. Avoid treating every light-coloured soil or slow spring start as proof that a large fertilizer dose is needed.
Balance an early start with unsuitable cold exposure
Onions can be planted in cool spring conditions once the bed is workable, but prolonged cold exposure can contribute to bolting in susceptible planting material. Cold tolerance is not a reason to ignore the condition of the sets, transplant development or the forecast. Waiting for soil access and choosing suitable material are part of one decision.
There is no one thermometer number that resolves every method and cultivar. Compare the local forecast, bed moisture and instructions supplied with the material. A sheltered raised bed differs from a low place that holds cold air and water. If conditions are unsuitable, store sets according to the supplier's instructions and keep transplants in an appropriate growing environment rather than crowding them into a wet bed.
Inspect sets before placing them in the row
Sort through the material and remove bulbs that are soft, rotting or badly damaged. Keep sound labelled lots separate. A sprout is not the same as a rotten base, so examine the whole bulb before deciding. Ask the supplier about questionable batches instead of assuming a soak will make all material healthy again.
Plant with the root end down and pointed end up, following the cultivar and supplier's guidance for depth and spacing. Do not bury sets as if they were potatoes or plan to hill soil repeatedly around developing onion bulbs. Allow space for the intended bulb size and for shallow weeding. Mark row ends so new growth is not confused with weeds.
Prepare a fine seedbed for direct sowing
Direct-sown onion seed needs contact with suitable fine soil and moisture during emergence. Follow the packet for that cultivar's sowing depth and intended spacing. Break large surface clods without working saturated soil. Mark the row clearly; young onion seedlings are small and easy to lose among weeds or disturb during later work.
Check the seed row while emergence is under way instead of assuming that wet soil deeper in the bed guarantees a moist seed layer. Avoid washing seed out with a strong jet. As plants develop, thin according to the intended crop and packet guidance. Keeping every seedling at any cost can leave a crowded row unsuited to the full bulbs you originally wanted.
Handle transplants as living plants
Choose transplants with sound bases and roots, and keep them from drying during transport and planting. Plants raised under cover need gradual adjustment to outdoor conditions. Do not move tender crowded trays straight from a warm dim room into an exposed bed. Check their response during acclimatisation and keep the root zone adequately moist.
Plant carefully at the appropriate depth for the material, without folding roots into a tight wad. Water to settle the root zone, then check drainage and soil moisture. The guide to raising seedlings at home helps with the earlier preparation stage. A transplant's planting needs differ from those of a dry seed or a small bulb.
Do not make disinfection recipes the starting point
Clean, traceable planting material and a suitable bed matter more than an unverified household treatment. Do not invent a hot soak, salt concentration or mixture of several products for every batch. Damaged or rotting material should not be accepted merely because a recipe claims to disinfect it. Ordinary fertilizer is neither a seed disinfectant nor a treatment for onion rot.
If a particular treatment is being considered, verify its actual intended use and current Ukrainian label before application. Keep that decision separate from feeding. A solution intended for root nutrition of growing plants should not automatically become a preplant dip for seeds or sets. Preserve the cultivar and batch identity so any problem can be traced to the material used.
Choose nutrition for the growing plant
This concentrate includes vegetables and vegetable seedlings in its intended uses. Assess the bed and earlier inputs first, then match the instruction to plant development. The instruction distinguishes adult plants and seedlings; it does not describe soaking dry seed or sets before planting.
Complex fertilizer for vegetables, fruit and berry crops, and flowers
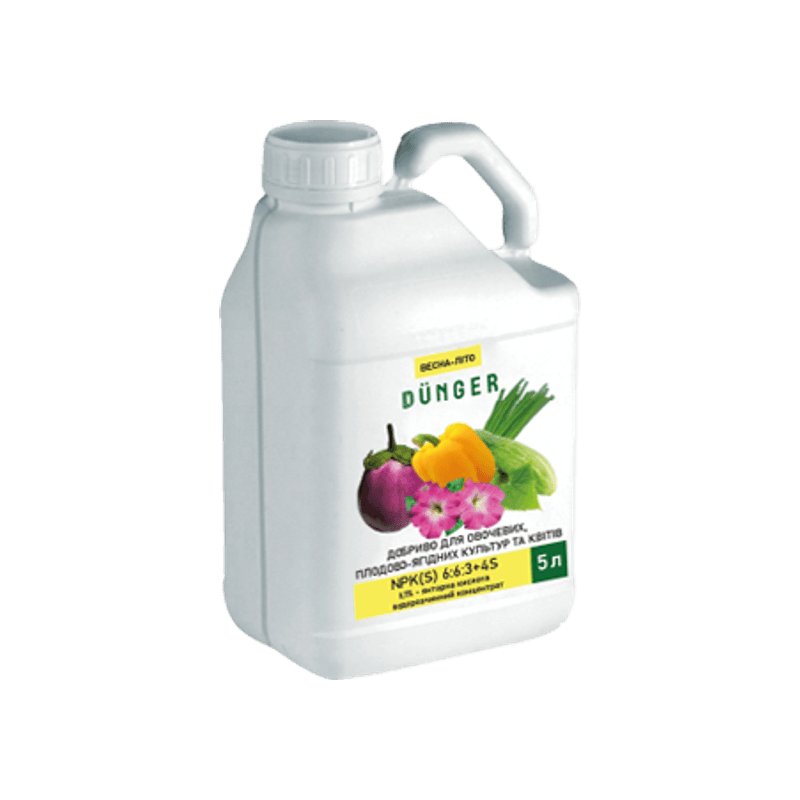
Used throughout the entire period of plant development and growth. For root feeding into the soil/substrate, dilute 50 ml of fertilizer in 10 L of water (100 ml of solution per 1 plant) and use at intervals of 10-12 days. For foliar treatment (spraying), dilute 25 ml in 10 L of water and apply with a sprayer, ensuring even coverage.
For treating seedlings, halve the concentration of the working solution!
The product is offered in a 5 L canister. Calculate needs from the appropriate instruction before selecting the number of packs. In My Garden, set zones, crop and measurements for a product plan. Keep your own notes of previous fertilizer; nutrition cannot correct an unsuitable cultivar or a persistently waterlogged bed.
Give the new row a clear first-care routine
Onions have relatively shallow roots and compete poorly with weeds. Check moisture in the active root zone and remove small weeds carefully before they dominate. Use shallow cultivation rather than cutting deeply beside the bulbs. A dry seed row, an uprooted transplant and a soft rotting set require different responses, even if all three initially look like gaps in the planting.
Walk the row after establishment and compare different sections. Where growth is uneven, inspect moisture, planting depth and material condition before adding fertilizer across the whole bed. Keep the cultivar and planting-method labels visible. These checks make later feeding and harvest decisions more useful than trying to correct an unexplained uneven row with one general treatment.
For neighbouring beds, use Vegetables and greenhouse to plan each crop separately, rather than transferring an onion planting date to crops with different requirements.
Questions about planting onions in spring
No. A seed must germinate, a set is a small bulb and a transplant already has living roots and leaves. Their depth, handling and early moisture checks differ. Follow guidance for the actual material and cultivar rather than use one method for all three.
No. Cultivar, storage history, bolting, growing conditions and intended harvest matter. Choose sound appropriate material rather than judging only by size. Ask the seller how the batch is intended to be used and keep different lots separate.
Use workable, drained spring soil and suitable material, while considering cold exposure and the forecast. Waiting for hot weather is not a universal requirement, and planting into frozen or saturated ground is also inappropriate. The decision depends on the method and local conditions.
First check cultivar day-length adaptation, planting history, crowding and plant condition. Additional nutrition cannot change the variety's day-length response. Decide whether feeding is needed from soil and growth evidence rather than from missing bulbs alone.


