


Before trying to eliminate chafer grubs from soil, establish whether they are actually damaging roots. A pale curved larva beside a plant does not explain wilting by itself, and a discovery in compost does not mean the whole garden is infested. For a small affected patch, start with careful root inspection, identification and hand collection of confirmed root-feeding grubs during soil work. Further decisions depend on the crop, the extent of damage and plant condition.
What does a chafer grub look like?
Typical larvae in this group are pale and fleshy, often curved into a C shape, with a brown head and three pairs of legs nearby. However, several beetles have similar larvae. Identification requires structural details and the place where the insect was found. Body colour and shape alone cannot reliably identify every specimen.
Some similar larvae feed on decomposing organic matter. Rose chafer larvae can occur in compost and rotting wood. Do not automatically destroy such finds or distribute unidentified larvae around planting beds. Photograph the location and the larva from the side and underneath; retain a sample for identification if needed. Compost and visibly eaten living roots provide different evidence.
Inspect the plant as well as the insect
Root feeding can accompany poor growth and wilting. Drought, waterlogging and root disease can produce similar appearances. Before digging up an entire row, check moisture below the surface, the stem base and the distribution of weak plants. A simultaneous decline after a watering change calls for different questions from several isolated damaged bushes.
Carefully expose soil beside one affected plant while preserving roots for examination. Look for feeding damage and larvae within the root area. An already dead plant may provide information without sacrificing a healthy neighbour. Compare the findings with nearby plants rather than attributing every symptom to one incidental larva.
A short decision guide
| Observation | Meaning | Next action |
|---|---|---|
| Larvae only in compost | Root feeding is unconfirmed | Identify them before treating the garden |
| Eaten roots with larvae nearby | An affected patch needs investigation | Collect confirmed pests and inspect neighbouring plants |
| Wilting without grubs or feeding marks | The cause remains uncertain | Check water, roots and other damage |
| Continuing losses in several areas | A local inspection is insufficient | Prepare samples for professional assessment |
Why the particular Ukrainian site matters
Chafer larvae can damage vegetable, berry and fruit crops. Their distribution is uneven, so a report from a neighbouring field does not establish conditions in your bed. Areas beside shelterbelts or perennial plantings deserve attention, particularly after earlier damage. This is a reason to inspect, rather than automatically classify an entire garden as infested.
Soil conditions and weather influence where larvae occur within the ground. A surface inspection after drought may differ from one during a moist period. Do not assign one spring inspection date to every Ukrainian region, or assume that an empty surface clod proves complete absence. For repeat observations, record moisture, location and approximate discovery depth.
Organise a small investigation
- Mark affected plants on a simple plan, distinguishing healthy areas.
- Inspect several representative locations rather than only the worst plant.
- Compare similar amounts of soil so records describe comparable searches.
- Count larvae found and keep photographs or a sample for identification.
- Record crop, plant age, root condition, weather and recent watering in your own journal.
- Revisit places with new symptoms without unnecessarily disrupting every root system.
A grub count is not a universal treatment threshold. Consequences depend on the species, larval stage, crop and root development. A threshold for a field crop cannot simply be transferred to a container plant or strawberry bed. For a larger site, give an adviser the sampling method as well as the total number found.
Actions without pesticides
Collect confirmed root-feeding larvae encountered during planned digging or planting-hole preparation. On a small bed, this removes the particular grubs found; it does not prove the destruction of all eggs and larvae deeper down. Avoid aggressively digging around an established bush merely to search. Tool damage can create another root problem.
When preparing ground before planting, break apart clods and inspect a purchased plant's root ball without unnecessary destruction. Do not move suspicious soil into other planting holes. Investigate a confirmed problem patch before placing new vulnerable plants there. The loss of an earlier plant in that same position is useful information.
Cultivation can expose some larvae to natural enemies, including birds. However, do not leave living roots exposed to achieve this, or expect a complete clearance in one day. Restore suitable growing conditions after the work and continue observing. Judge progress through new findings and plant condition rather than the number of grubs collected once.
Avoid improvised soil drenches
Do not pour household toxic mixtures, concentrated salts or arbitrary solutions into soil as a universal remedy. Advice without a defined crop, intended use and application conditions does not become dependable through repetition. A fertilizer name does not make a product an insecticide. Increasing nutrient concentration indiscriminately does not help damaged roots.
If considering a plant protection product, establish the pest identity and verify its current permitted use in Ukraine for the actual crop and application method. An old notice, foreign label or forestry nursery recommendation is not a ready-made programme for your strawberries or vegetables. Gather site information and seek a decision for that situation. Do not improvise mixtures of pesticides and fertilizers.
Nutrition after assessing plant condition
A liquid compound is available for vegetables, berry crops and flowers with roots in a condition suitable for feeding. Consider it for a nutritional need, not to kill grubs or treat injured roots. The root-feeding row for that group appears below; check the full instructions and separate seedling requirements before use.
Complex fertilizer for vegetables, fruit and berry crops, and flowers
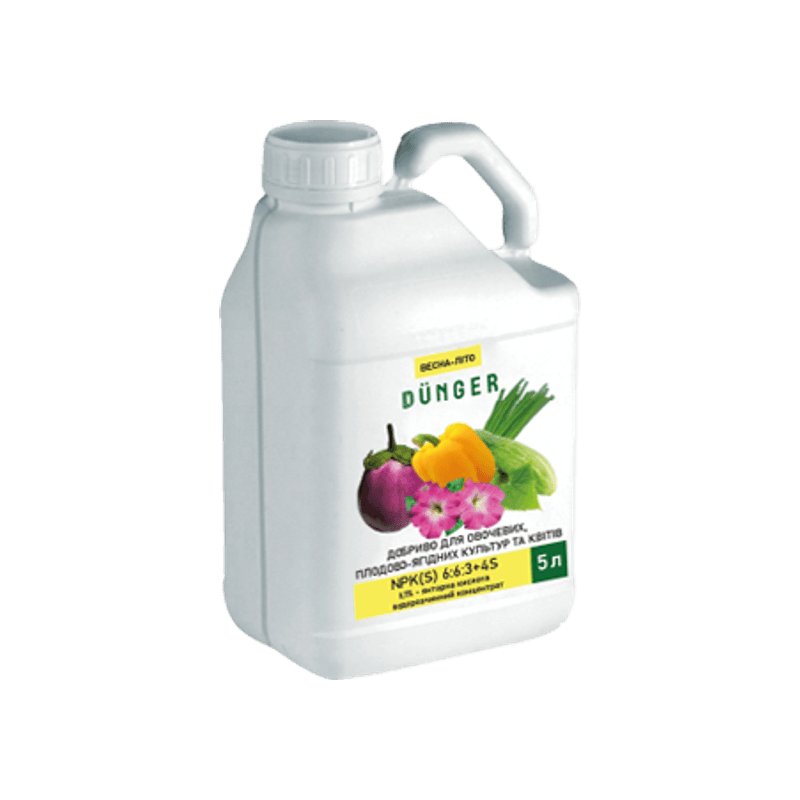
Vegetables of all types, fruit and berry crops, flowers (root feeding)
50 ml/10 L of water (100 ml of solution /plant)
Set the crop and zone measurements in My Garden for a feeding plan. Record grub findings and work in your own journal.
Care after inspecting the roots
Assess how much living root remains and whether the plant is anchored. Do not expect fertilizer alone to restore a severely damaged young plant. Re-establish soil contact, check moisture and avoid adding water to an already wet planting hole. The guide to assessing soil before fertilizing helps separate site conditions from assumptions about nutrition.
For an affected cucumber bed, return to normal feeding by cucumber growth stage only after checking root condition. Do not transfer one programme to every damaged crop. In your own notes, separate grub collection, watering and feeding so a later inspection can show which conditions actually changed.
What to prepare before asking for help
Include a wide view showing the affected area and close photographs of roots and larvae. State where each specimen came from, whether it was in living roots, ordinary soil or compost, and whether neighbouring plants are affected. Mention recent digging, irrigation changes and new planting material. Keep observations separate from your suspected explanation so an adviser can assess both.
For a small garden, a clear sketch can be more useful than a long list of product names already tried. Mark paths, older plantings and the positions where losses began. If identification is uncertain, ask how to submit a sample before transporting it. The aim is to choose a response matched to the actual organism and planting.
Common questions
No. Similar larvae can feed on different organic material, including decomposing matter in compost. Identify the insect together with its location and the damage pattern, rather than using pale colour alone.
Adults and larvae occupy different places and damage different plant parts. Collecting beetles does not establish that soil is free of larvae. Inspect the root area separately when there are signs of a problem.
No. Fertilizer supplies plant nutrients and is not used as an insecticide. Assess nutritional needs separately after establishing the cause of damage and checking the roots.
When the larva cannot be identified, losses continue or several areas are affected. Prepare photographs of plants, roots and larvae, the crop description and soil conditions. These are more useful than requesting a product without a diagnosis.


