


Put spent coffee grounds in a mixed compost pile in small amounts. A handful in the compost bin behaves differently from a layer around tomato plants. In a pile the grounds break down with other materials. Spread directly over the soil, fine grounds can clump, and too much uncomposted material can suppress germination or plant growth. Decide where the kitchen scraps should go first. Then make a separate decision about what your plants need to grow.
What remains after brewing
Used coffee grounds contain organic matter and some plant nutrients. The presence of nitrogen alone tells you very little about what a root can take up this week. The microbes decomposing the material use nitrogen as they grow. With no known nutrient composition or stage of decomposition, you cannot measure out grounds as a substitute for a fertilizer whose label lists its nutrient content and the amount to use for a given crop.
Grounds from a coffee pot, a paper filter or an espresso machine can differ in particle size and moisture. The common practical problem is that damp, fine grounds tend to form a compact layer. This can interfere with even wetting. After watering, see what is happening below the surface. A dark crust on top tells you little about whether the root zone has received water. Sending the grounds straight to the compost pile avoids making that crust in the first place.
Why skip a direct application to plants?
Seed beds, young plants and pots
Where seeds are germinating, changing the growing medium has the highest stakes. Trials applying uncomposted spent coffee grounds directly to soil found that they suppressed growth in the crops tested. Those results cannot give you a universally safe amount for every crop and soil. Keep grounds out of seedling mixes, away from freshly sown rows and off the surface of houseplant pots. In a small container, an ordinary kitchen portion can occupy a substantial share of the space around the roots.
If you just tipped some grounds into a pot and they are still sitting on top, lift the visible material off without breaking the root ball or damaging roots. Next, check the drainage holes and feel below the surface for moisture. If the plant is getting weaker, consider any other recent changes, such as a spot beside a radiator, a different watering routine or fertilizer that was already added. Avoid trying to compensate for every possibility with another product.
Plants that prefer acidic soil
The taste of brewed coffee does not tell you the pH of the used grounds. Even a reading from one batch of grounds cannot predict what will happen to the pH of an entire bed. Treat the acidity of a blueberry or rhododendron root zone as something to measure and manage. If the blueberry bed sits next to a vegetable plot, or several plants have their own containers, assess those areas separately. Irrigation water can differ between properties, too. A measurement is more useful than assuming every acid-loving plant needs the remnants of your morning coffee.
How to put spent coffee grounds in compost
- Collect plain grounds. Separate them from capsules, stickers and packets. Leave drinks containing milk or cream out of an ordinary home pile. If you use a paper filter, check that it has no plastic part before adding it.
- Keep some dry material handy. Set aside shredded dry leaves or small pieces of plain uncoated cardboard with the tape removed. Break up any wet lumps and mix them through different materials so there is space for air, instead of leaving a solid band of wet grounds.
- Monitor moisture. The mix should be damp without water collecting at the bottom of the bin. If the pile gets heavy and smells unpleasant, see whether it needs mixing and more dry material. Restore those conditions before adding the next portion of coffee grounds.
- Wait for mature compost. Toward the end the material looks dark and crumbly, smells earthy and most of what went in is no longer recognizable. If new ingredients are still distinct or the pile smells sharp, let it break down further. Time varies with moisture, temperature, particle size and how the pile is managed.
In a small Ukrainian garden, save some autumn leaves for the compost bin so kitchen scraps do not make up most of what goes into it. An open box can get too wet after a run of rainy days. In a sunny, windy courtyard, the outside can dry while the middle is still damp. Check inside the mix instead of judging by the material under the lid. A cold winter pile will not break down at the same rate as a well-managed pile in warm weather.
Decide separately about compost and feeding
In a bed with compacted soil, first look at how water moves through it, where puddles persist and what you have already added. For a new bed, consider the needs of the crop you plan to grow. Mature compost can be one way to improve soil, but its composition depends on what it was made from. If a bed has received a generous amount of compost or manure every year, do not automatically repeat the same application next season. Start by assessing your soil before fertilizing and use laboratory testing if you need to know the nutrient status.
When growth is poor, check whether it is poor across the whole bed. If one shaded corner or one area that stays wet is worse, treat them as separate growing conditions. Grounds cannot give a plant more light or fix an area with inadequate drainage. Record what is growing, when it was watered and what materials went into the bed. Those details make it easier to decide whether feeding is appropriate or a change to the growing conditions would be more useful.
Choose the right material for each growing space
A mixed compost that includes spent grounds and a potting medium have different jobs. When preparing a bed, you can decide whether the soil needs an organic amendment. A seed tray needs an even mix that wets consistently from one cell to the next. Material that works in a garden bed does not automatically suit a tray. Compare those different jobs in our guide to seedling growing media before choosing a mix.
If you have more grounds than you can mix with garden material, you do not have to put them all into the same bin. Use only what can be distributed without forming clumps. Put the excess into a later mix if you can store it appropriately, or use a local collection route for food waste where available.
Fertilizer when a bed needs separate feeding
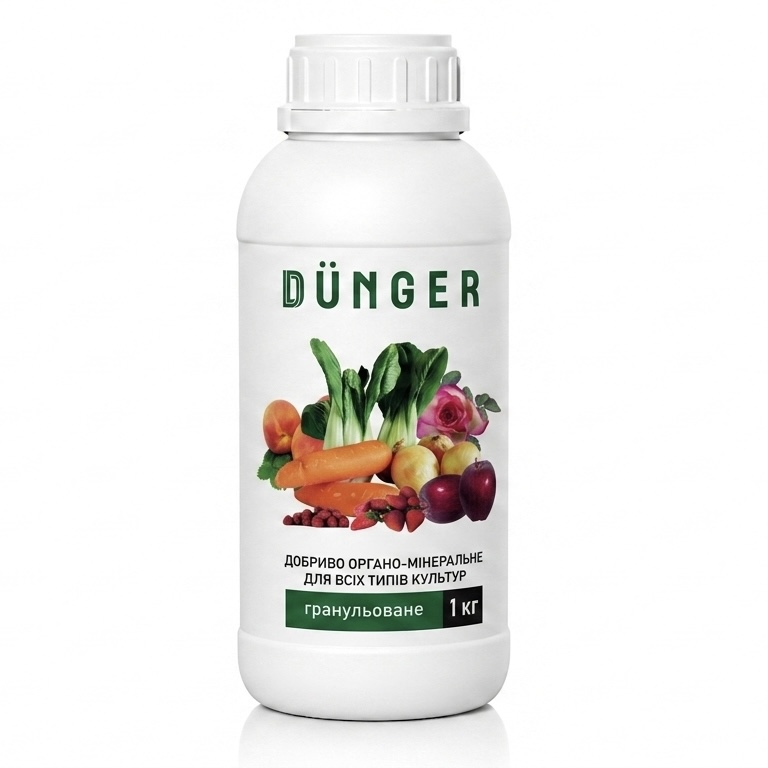
Organo-mineral fertilizer for all types of crops granular
For a vegetable bed with an established nutrient need, compare this granular product with your current care plan. Check the directions for your crop, its growth stage, the soil condition and what you have already added. Avoid mixing the fertilizer with uncomposted grounds in a pot or a seed row.
The fertilizer is used for the main application for plowing, digging in autumn or spring, as well as for fertilizing plants in the spring-summer period of active vegetation, the fertilizer is also used for laying greenhouse and seedling soils and soil mixtures. Apply the scattering on the site or in the root zone on loose, moist soil, as well as in planting holes when planting plants and seeds. Application rates are calculated depending on the species, characteristics, size and age of plants. Feeding is recommended 2-3 times a season.
Compare the 1 kg and 5 kg pack options with the amount you need according to the directions. Check current purchasing information on the product page. If you are unsure whether feeding is needed, finish assessing the bed first.
Frequently asked questions
Grounds contribute organic matter and contain nutrients, but you cannot know how much the crop will get when it needs it. Where the soil assessment and the plant's condition point to a need for feeding, use a product with known composition and directions. The grounds can still be a separate ingredient in mixed compost.
Fresh damp grounds can go into an active bin when you mix them with dry materials. If you want to save several portions, avoid leaving damp scraps indoors for a long time or letting them turn into a compact mass. There is no need to collect a large amount for a small pile.
Experiments using caffeine solutions do not establish that a ring of spent grounds will protect plants in your garden. The concentration left in the grounds is unknown. If something is feeding on the crop, identify the culprit first instead of adding grounds around the seedlings.
Remove what you can reach on the surface without disturbing the stems and roots. Check that water can get beneath the surface and drain away. Decide whether to loosen the soil, water or feed only after inspecting that area. Those are three different decisions, not a required sequence.


