


You can propagate a hydrangea for your garden from a cutting or by layering a branch. A cutting is detached from a healthy shoot and encouraged to make roots. A layer remains connected to the parent until it has developed its own root system. Choose according to the plant species, available shoots and the attention you can give the young plants.
Prepare a rooting area and somewhere to grow the plants on before cutting anything. A few well-tended cuttings are more manageable than a crowded tray without a suitable position. Consider heat, watering during absences and where the young plants will spend the cold season. Successful rooting is only the first part of growing a new shrub.
Choose a healthy parent plant
Record the species and cultivar. Bigleaf, panicle and smooth hydrangeas differ in their later care. If the parent has no label, start by identifying it. An attractive flower head is not enough to select propagation material: examine leaves, young shoots and the condition of the whole shrub.
Use healthy material without obvious pest or disease damage. If the parent is yellowing, investigate first; our guide to checking hydrangea chlorosis helps organize that assessment. A doubtful shoot does not become suitable simply because you intended to prune it anyway. Clean tools, containers and work surfaces before making the first cut.
Choose between cuttings, layers and seed
Cuttings and layers produce vegetative offspring and retain the parent's cultivar identity. Seed-grown plants may differ, so sowing is unsuitable when you want a copy of a particular cultivar. Genetic similarity still leaves growing conditions important: a new plant needs an appropriate site and care rather than being guaranteed the same performance.
Layering suits a low, flexible branch that can reach the ground without snapping. Cuttings need a separate rooting environment. If branches are rigid or too high, do not force them downward. Select another shoot or use cuttings. A small parent plant need not supply material for every possible technique at once.
Match the timing to the shoot
Softwood cuttings use flexible young growth from the current season, commonly in late spring or early summer. Semi-ripe material has a firmer base and represents a different stage. Look at the actual shoot instead of assuming any branch is suitable because a particular month has arrived.
In Ukraine, spring warmth, the species and local growing conditions shift the opportunity. Prepare protection from direct sun on a hot site and confirm that suitable growth has developed in a cooler garden. Avoid starting just before a prolonged absence unless someone can inspect the containers. Fresh cuttings need regular attention.
Prepare the container and rooting medium
Use a clean pot or tray with drainage holes. A rooting medium needs to retain moisture while allowing air and excess water through. A prepared cutting mix offers a practical starting point; check its intended use. A heavy lump of soil taken from the border does not provide the same control in a small container.
Moisten the mix and let excess water drain before inserting the cuttings. Prepare cultivar and date labels, and make planting holes with a clean dibber. Have a transparent cover and supports ready to hold it above the leaves. Organizing these items first reduces the time cut material spends waiting while it loses moisture.
Prepare a softwood cutting
Select a healthy shoot without a flower head and remove it with a clean, sharp tool. Work during a cooler part of the day with unwilted material, then keep it out of the sun. Locate the nodes, where leaves attach, and prepare a short cutting with the lower cut just beneath a node.
- Remove lower leaves that would otherwise sit in the rooting medium.
- Keep upper leaves; large blades can be reduced by about half to limit water loss.
- If using a rooting product, follow that product's own instructions.
- Insert the base in the prepared hole without burying foliage.
- Firm the mix gently and label the cultivar.
- Arrange the cover so it does not rest on the leaves.
Fertilizer for established shrubs is not a substitute for a rooting product. Avoid mixing assorted powders and solutions in an attempt to strengthen the treatment. Label each batch immediately. A clear label is much more useful than trying to recognize cultivars from small leaves several weeks later.
Care while roots form
Place the cuttings in bright light away from scorching direct sun. A cover limits water loss but does not replace inspection. Check moisture, ventilate and remove material that is rotting. Keep the medium moist without persistent standing water. Condensation on a lid is not an instruction to add more water automatically.
If leaves wilt, inspect light, heat and moisture. A dark, soft stem base calls for examining the material and its conditions, not adding fertilizer. Check the rest of the batch. Photographs and brief notes in your own journal help compare changes without relying on memory or repeatedly disturbing the plants.
Make a layer from a flexible branch
Choose a healthy low branch and mark where it meets the soil. Remove leaves from the section to be buried. A light wound on the underside can encourage rooting; work carefully without cutting the branch through. Secure that section in a shallow trench, cover it with soil and keep the shoot tip above ground.
Maintain appropriate moisture and check that the peg remains secure. Do not detach the layer on a predetermined date: it first needs a sufficient root system of its own. Once rooted, it can be separated and grown on. Its continuing connection to the parent is useful, but the method still requires patience and observation.
Move on only after checking roots
Do not pull every cutting out each day. When assessment is appropriate, carefully examine a representative plant while preserving its roots. A new leaf does not replace checking root development. Once roots are sufficient, gradually increase ventilation so the plants become accustomed to life without a continuously humid cover.
Transfer them gently into individual pots. Choose their growing medium for the species; our guide to hydrangea soil, acidity and drainage explains the next considerations. Plan moving a potted hydrangea into garden soil after growing it on and assessing the weather. A small cutting with its first roots still needs attentive care.
Keep batches at different stages clearly separated. A well-rooted plant ready for a larger pot should not dictate the treatment of a freshly cut stem beside it. Check the plant itself before changing its container, removing protection or planning feeding. This avoids turning one successful cutting into a timetable for every other one.
Feeding the parent shrub and established plants
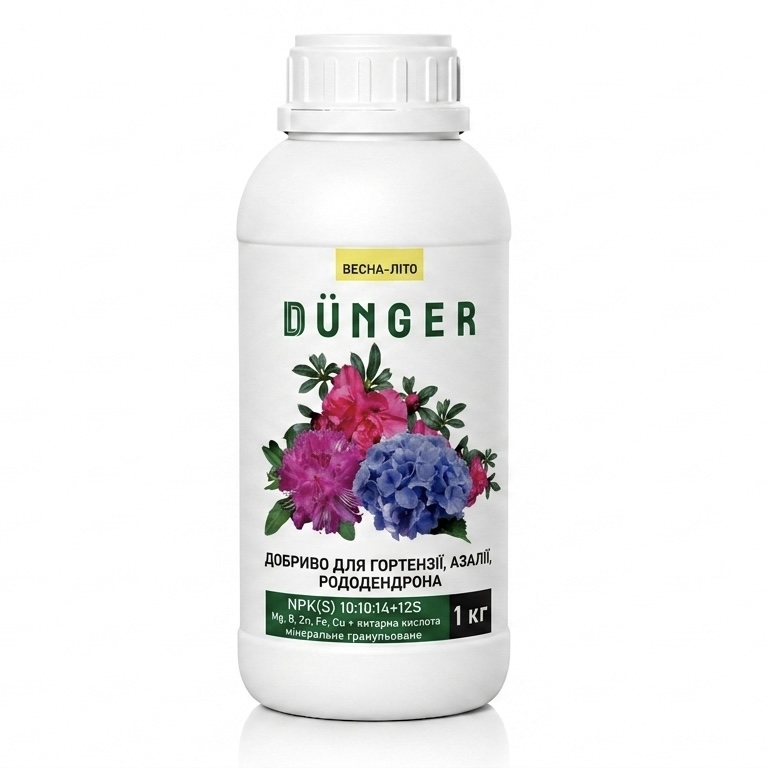
Complex fertilizer for hydrangea, rhododendron, azalea granular
This specialized complex is an option for hydrangeas already growing as shrubs. Plan its use separately from cutting care: the parent plant, an established young plant and a freshly cut shoot are at different stages. Check shrub age, size and nutritional need before purchase. The shrub instruction must not be transferred to material without roots.
The complex is used in spring and summer, before planting shrubs, as well as for fertilization. The fertilizer is evenly distributed on the soil surface along the stem circle of the plant, departing from it by 15-20 cm or added to the hole during planting. The application rate is determined taking into account the size and age of the bush. The soil should be moist during fertilization. The first feeding is recommended immediately after waking up (after the snow melts), when the shoots appear after spring pruning; subsequent feeding at the beginning of budding.
Use My Garden for plant and zone measurements and purchase planning. Keep cutting dates and observations in your own journal. Choose a pack for established plants, rather than treating the number of fresh cuttings as a fertilizer requirement.
Frequently asked questions
For the softwood method described here, select a healthy non-flowering shoot. Do not choose a flowering tip simply because it looks attractive or is easy to reach. Check the material and prepare its rooting position first.
Judge root development rather than expecting one deadline for every cutting. Species, material and conditions differ. After rooting, gradually accustom plants to lower humidity and handle them carefully when potting on.
A shrub rate must not be transferred to an unrooted cutting. Initially provide suitable medium, moisture and light. Plan feeding of the parent and later established young plants separately, according to their condition and the product instructions.
Seed-grown offspring may differ from the parent. Vegetative propagation retains cultivar identity. Label material as you collect it so plants from different parent shrubs remain identifiable after growing on.


