


Move a potted hydrangea into the garden once you have identified its species and cultivar, prepared a suitable site and checked its readiness for outdoor conditions. Water the rootball before planting, avoid planting too deeply and water after backfilling. During establishment, the main task is to maintain suitable root-zone moisture and observe the plant rather than immediately carry out every possible feeding and pruning treatment.
A flowering gift plant and a nursery shrub grown outdoors may need different preparation. Large flowerheads do not establish winter hardiness. Keep the label and ask how the plant was grown. This helps with site choice and acclimatisation, and prevents assuming that successful planting guarantees flowers the following year. The plant's identity remains useful long after its present flowers fade.
Identify the hydrangea you own
Ask for species, cultivar, mature dimensions and suitability for local winter conditions. A large plant in a small container will not necessarily stay compact. Panicle, smooth and bigleaf hydrangeas also differ in pruning requirements. Record the name while the label is still available; it will help with decisions several seasons later, when appearance alone may not answer your questions.
If the plant was bought flowering during cold weather for an indoor display, ask whether it was forced into bloom. Some florist bigleaf cultivars do not reliably overwinter or flower in cold climates. That does not describe every hydrangea cultivar. Obtain information about this particular plant. A photograph of similar flowers does not replace its name or establish its suitability for your garden.
Choose the planting day
Spring and autumn often make moisture management easier for shrubby hydrangeas. Container growing offers flexibility, but does not make frozen, waterlogged or severely dry soil suitable. Planting during hot weather requires reliable access to watering and inspection. Avoid planting immediately before leaving home if nobody can check the new shrub and its rootball during your absence.
In Ukraine, consider local weather, soil condition and the plant's preparation together. Late frost can damage young growth. One date for a southern garden and a cooler site is not a dependable rule. A plant kept in a warm room needs its transition outdoors addressed before permanent planting, rather than after leaves show damage from an abrupt change.
Acclimatise a plant grown under cover
A greenhouse or indoor plant needs gradual exposure to cooler air, wind and outdoor light. Begin in a sheltered position, watch the foliage and increase time outside progressively. Do not place tender growth straight into exposed sun and a cold night. If conditions deteriorate sharply, restore protection and reconsider the pace of acclimatisation rather than forcing the original plan.
Hardening off does not make a tender cultivar winter hardy. It helps the plant move between growing conditions without changing its inherent characteristics. For a nursery shrub already standing outdoors, ask how it has been kept recently. That information is more useful than a universal instruction to hold every newly bought container indoors for the same number of days.
Allow for the mature shrub
Many shrubby hydrangeas suit light shade; a sunnier position requires adequate moisture. Avoid exposed sites and frost pockets. Consider paths and space for the mature crown. A small pot fits easily beside steps, but the grown shrub should not block a necessary route. Position the container temporarily while assessing the space before committing to the planting hole.
Check where water runs from roofs and neighbouring surfaces. Do not assess drainage only on a dry day. If the planting hole fills with water, address drainage or choose a different position first. A bag of special growing medium does not determine how water will leave the surrounding ground. The guide to soil for hydrangeas explains the relevant soil properties.
Prepare the rootball and planting hole
Water the plant while it is still in its pot. Prepare the site and watering equipment before removing it, so exposed roots are not left drying while you find tools. Remove the container carefully, supporting the rootball. Avoid pulling on soft shoots or flowerheads. If the pot resists, loosen its sides rather than increasing the force applied to the stems.
Inspect the outer roots. A rootball that is not potbound does not need dismantling simply as a routine. Where roots form a dense circling layer, prepare them to grow into surrounding soil; if unsure about cutting, show the nursery a photograph first. Inspection aims to allow appropriate root placement, not to wash away every trace of the original growing medium.
Make the hole wide enough for the rootball without making it excessively deep. For a hydrangea, keep the surface of its potting medium level with the surrounding soil. Check before backfilling. Do not bury the base because soil remains unused. Adjust the hole first, position the shrub and then fill the space around it carefully.
The first watering and later inspections
Water after planting to moisten the root zone. Afterwards, check beneath the surface: soil beside the rootball can remain dry even when rain has visibly wet the top. Excessive watering is also possible. Do not add water automatically whenever leaves droop without checking the soil, particularly in heavy ground where drainage is poor. Similar-looking leaves can accompany different root conditions.
Mulch helps conserve moisture, but keep it away from the woody base of the shrub. Leave access for inspection and weeding. Record planting day and photograph the starting condition. If leaves yellow or growth deteriorates, gather observations. The guide to yellowing hydrangea leaves helps separate investigation of the cause from a rushed decision to add another fertilizer.
Choose a follow-up routine you can maintain. The first season includes changing weather, so an initially suitable watering pattern may need adjustment. If someone else will care for the plant, show them the rootball position and explain where to check moisture. Leave the cultivar name and planting date with those notes. This is more helpful than a fixed watering instruction detached from the actual ground conditions.
Fertilizer within later care
Once a feeding need is established, a suitable crop-specific option is Complex fertilizer for hydrangea, rhododendron, azalea granular.
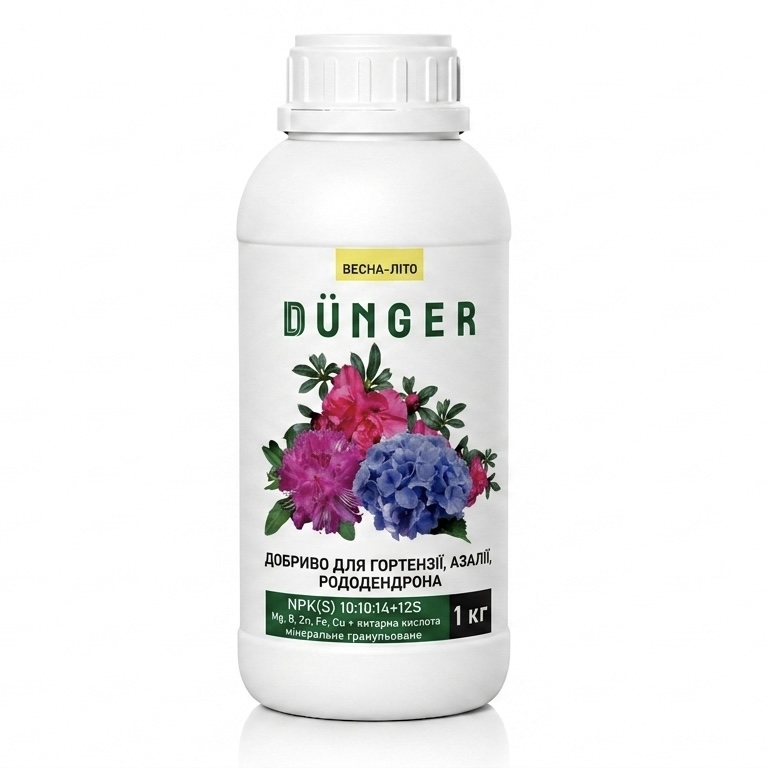
N 10%; P2O5 10%; K2O 14%; S 12%; B 0.35%; MgO 0.2%; Succinic acid 0.1%
The application rate is determined taking into account the size and age of the bush. The soil should be moist during fertilization.
Feeding is not compulsory for every transplant. First account for nutrients already in the potting medium and anything added to the planting area. This complex is intended for spring and summer use; autumn planting does not change its stated season. Fertilizer does not correct excessive planting depth or standing water.
Packs are 0.5, 1 and 5 kg. Compare them after identifying the need rather than using planting-hole size as a guide. In My Garden, save the plant count. Record planting dates and earlier applications in your own garden notes. This connects a later purchase with the particular shrub and its development. Read the selected product's complete instructions before use.
Before reaching for secateurs, understand the differences in pruning different hydrangea species.
Questions after planting out
No. Moving the plant does not prescribe the same pruning for all hydrangeas. Identify the species and inspect branch condition first. In some groups, flowering depends on previous-year stems. Do not combine planting with severe shortening solely to create a tidier shape. A pruning decision should have its own purpose and fit the plant concerned.
Flowers do not remove the need to check cultivar, growing history and weather. A container plant still needs a moist rootball, suitable position and continuing care. If it came from a warm indoor environment, prepare it for outdoor conditions. Do not assume every flowerhead will remain unchanged regardless of the weather and transition.
There is no single guaranteed period for every plant. Monitor new development, leaf condition and moisture, and continue care through the first season. Do not test rooting by repeatedly lifting the shrub. If its condition worsens, review planting depth, water and the site, and prepare photographs for advice rather than adding several treatments at once.


