


Sow spring carrots directly where they will grow once the soil is workable and gradually warming. A fine seedbed, shallow covering, consistent moisture until emergence and timely thinning are the essentials. Rushing onto a wet bed for the sake of an early date can leave compacted soil and a crust that obstruct seedlings and developing roots.
Choose the purpose of the crop first
Early fresh eating and long storage may call for different cultivars and sowing windows. Read the packet for intended use, root shape, suggested growing period and approximate development time. A number of days is not a promise of harvesting on an exact date regardless of temperature, moisture and crowding.
A long root needs a suitable depth of loose soil. For shallow, stony or heavy ground, compare shorter or round-rooted types. Cultivar choice does not replace preparation, but it helps match the crop to the real site. On a small bed, label sowings intended for different uses rather than mixing leftover seed from several packets in one row.
Choosing the spring window in Ukraine
Southern, central, Polissia and foothill gardens reach spring readiness under different conditions. Assess the bed itself as well as a warm afternoon. Soil should allow preparation without smearing into sticky lumps. Getting ahead of neighbouring gardeners on a cold wet plot does not necessarily provide carrots with a better start.
Consider the forecast and your ability to maintain moisture after sowing. An exposed bed dried by wind requires different attention from a damp sheltered corner. Do not copy a date from another region without checking conditions. This guide prepares you for spring sowing; it is not an instruction to use a spring programme in November.
Prepare the bed without compacting it
Choose a sunny position that drains excess water. Remove stones, perennial weed roots and hard clods from the future rooting zone. Heavy soil does not automatically rule out carrots, but it must drain and remain uncompacted. Keep access from paths or bed edges instead of walking over the prepared surface while marking rows.
Account for compost and fertilizer already applied. Use well-decomposed organic matter when appropriate for the soil, rather than putting fresh manure directly beside seed. Random additions will not correct a wet compacted bed. The guide to assessing soil before choosing fertilizer provides a systematic starting point.
Plain seed, pellets or seed tape?
Ordinary carrot seed is small and easily sown too thickly. Pelleting enlarges individual seeds for easier placement, while seed tape provides predefined spacing. Compare seed numbers or tape length with the rows you actually need. A large packet is not automatically the best purchase for a small household sowing.
Read the instructions for that particular seed, especially its coating and preparation. Do not soak or further treat it merely because you did so with a different packet in another year. Keep the label, cultivar name and batch information. If emergence is uneven, those details help separate questions about the seed from conditions in the row.
Sowing step by step
- Level the surface and mark rows reachable without stepping on the bed.
- Make a shallow drill roughly 1 cm deep, checking the packet recommendation.
- If the seed layer is dry, moisten the drill before placing seed.
- Sow as evenly as possible instead of pouring a thick continuous band.
- Cover with fine soil and establish gentle contact without hard compaction.
- Label the cultivar, record the date in your own notes and maintain surface moisture.
Consistent depth within the row avoids leaving some seeds almost exposed while others sit beneath a heavy clod. Do not deepen the drill simply through fear of drying. Instead, arrange gentle watering that does not wash the row away or collect the small seeds in one hollow.
Waiting for emergence
Carrots are not always quick to emerge: germination may take several weeks depending on conditions. Avoid digging up a row after only a few quiet days. Check moisture and whether heavy rain or forceful watering has created a firm surface crust. Tiny seedlings can struggle to push through it.
Keep the seed layer evenly moist without turning the bed into a permanent puddle. Use a fine spray for gentle moistening. Avoid raking through the whole row to investigate, because germinating seedlings may still be hidden below the surface. Keep markers visible so the future crop is not accidentally weeded away.
Recognising and thinning the seedlings
The first carrot leaves are narrow; later leaves develop the familiar divided appearance. Crowded plants need room for their roots. Roughly 5-7.5 cm between plants is a useful garden guide, adjusted to the cultivar and intended root size. Do not retain a tight band solely to maximise plant numbers when you want larger carrots.
Thin carefully without loosening neighbours. Excess small seedlings can be snipped at soil level with clean scissors. Transplanting pulled seedlings is not equivalent to direct sowing: damage to the early taproot can affect the shape of the carrot. If another row is wanted, consider a fresh sowing in a prepared position instead.
Common difficulties and the first check
| Problem | Check | Useful response |
|---|---|---|
| No visible seedlings yet | Moisture, temperature, crust and depth | Assess the seed layer before resowing |
| A dense brush of seedlings | Actual plant spacing | Thin carefully |
| Leafy plants with crowded roots | Spacing and previous nutrition | Avoid automatically adding nitrogen |
| Surface dries rapidly | Wind, irrigation and soil structure | Arrange consistent moisture |
Nutrition for the carrot bed when needed
The universal granular compound has an application row for vegetables, the group that includes carrots. Decide whether it is needed from soil conditions and previous additions, rather than the sowing date alone. This is the group rate, not an amount for each seed. Read the full application instructions and choose the method appropriate to the stage of work.
Complex fertilizer universal granular
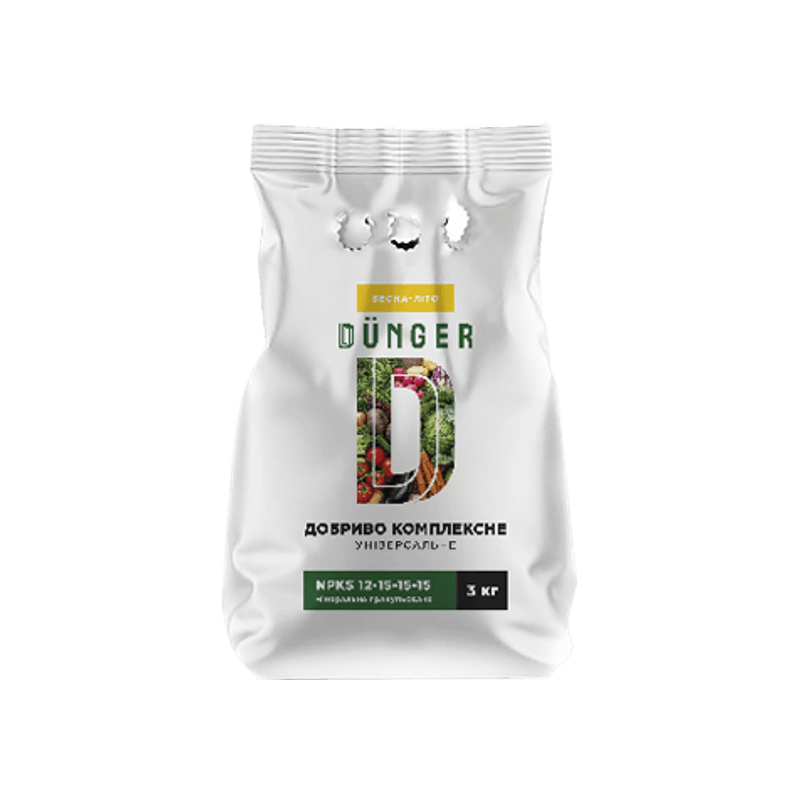
Vegetable, legumes and greens
20-40 gr/m²
Set the crop and bed area in My Garden for a feeding plan. Keep sowing and emergence dates in your own journal.
Care after the seedlings appear
Remove weeds before they overtake the carrots. Cultivate shallowly between rows and work especially carefully near plants. Do not dig around roots repeatedly to see how they are growing. As plants develop, check moisture in the rooting layer as well as at the surface, accounting for rain and soil type rather than applying one watering schedule to every bed.
If warm-season crops are planned nearby, do not assume they share the conditions suitable for spring carrots. For example, cucumber sowing and transplant timing depend on that crop's separate warmth requirements. Separate these tasks on your garden plan so readiness for one crop does not encourage premature planting of everything else.
Make the next decision from the row itself
Keep a simple record of cultivar, sowing date, seed format and the weather around emergence. Photograph the row when gaps or crusting first become visible. This gives you a useful comparison if another sowing in the same soil performs differently. Note which part receives wind or runoff rather than describing the whole bed as uniformly dry or wet.
Before resowing, inspect representative gaps and consider whether the earlier seed has had a reasonable opportunity to emerge. Adding more seed immediately can produce unexpected crowding when both sowings appear together. If a new row is needed, label it separately and reconsider the cause of the first problem instead of repeating the same depth and watering method automatically.
Common questions
For an ordinary bed, choose direct sowing. The taproot develops early and can be damaged or distorted during transplanting. A container can be the permanent growing place for a suitable cultivar, rather than a compulsory intermediate stage.
Compare moisture, covering depth, clods and crusting along the row. Also check seed condition and distribution. Patchy emergence does not establish a need for additional fertilizer.
Yes, if seed placement gives appropriate spacing and seedlings are not crowded. Tape or pellets can make placement easier, but assess the actual gaps once the crop emerges rather than assuming the layout is perfect.
When roots reach a usable size for your purpose. Follow the cultivar and its actual development. There is no need to wait for the largest possible carrot, and foliage length alone does not establish readiness.


