


Cold stratification gives lavender seeds a period of cool, moist conditions before sowing. For some lots of English lavender, it can improve the speed and evenness of emergence. Check the seed packet for the botanical name, cultivar and any preparation already done by the supplier. If the instructions call for a moist chill, allow time for it before sowing. If the supplier has already prepared the seed, follow the sowing directions for that lot. Have both a place for the cold treatment and a place to sow ready before opening the packet.
Decide whether to chill the seed
This guide concerns English lavender, Lavandula angustifolia. Packets with similar photographs may contain different cultivars or seeds that have been handled in different ways. Use the directions for the botanical species and seed lot you actually have. When buying, look for a clear distinction between untreated seed and seed prepared for sowing. A supplier may call the latter primed seed.
- The packet specifies a moist chill. Work back from a date when you can sow and look after the tray. Label the start date and the intended sowing date before wetting any material.
- The supplier gives direct sowing directions for prepared seed. Follow those steps. An extra cooling period takes up time and can complicate the job of handling the batch.
- The packet names the cultivar without explaining preparation. Ask the supplier. If the lot is large enough and the instructions allow it, use small samples from that one lot to compare two approaches.
- You collected the seed in your garden. Keep the source and year on the label. If matching a particular flower colour or shape matters, compare ways to propagate lavender, since seedlings can differ from the parent.
Set up a clean, moist chill
Choose a clean sealable bag or small transparent container with a lid. Use clean sand, vermiculite or the medium specified by the supplier. Dampen a small amount and let excess water drain away. The material should feel moist when pressed, with no puddle underneath it. A thin layer makes the tiny seeds easier to find. If the supplier describes a paper method, dampen it and squeeze out free water.
- Label the container first. Write the species, cultivar and lot, the start date and the planned sowing date. Add the harvest year for seed you saved yourself.
- Space out the seeds. Place them in contact with the damp material. A small gap makes it easier to pick up an individual seed if one starts to germinate before the others.
- Choose a stable spot in the refrigerator. Check it against the packet directions. Avoid a spot that freezes food or ice crystals onto the container.
- Look in from time to time. Check the material for drying or standing water and look for any emerging roots. Open the container on a level surface so the tiny seeds stay where you can see them.
What to check if the moisture changes
If the material has plainly dried out, dampen it lightly and give the moisture time to spread. A puddle calls for removing the extra water and, if necessary, replacing saturated material. Look at the layer touching the seeds. Droplets on the wall alone tell you little about conditions inside a fold of paper or beneath the surface of a handful of sand.
If you find a mouldy patch, keep that material out of the sowing tray and check the rest of the lot separately. Set aside seeds that look soft or clearly spoiled. If the problem has spread through the whole sample, start a small fresh trial with a clean container and closer attention to moisture. A batch that looks unchanged at the end of the specified cold period can still be ready to sow. Use the supplier's directions to decide when to move it.
Compare two samples from the same packet
If you have enough seed for a small comparison, divide some from a single packet into two equal groups and leave a few dry seeds in reserve. Chill one group in moist material using a method appropriate to that lot. Keep the second group dry until sowing day. Sow on the same day in matching cells, using the same mix. Label the groups before sowing. If a seed starts growing in the refrigerator ahead of time, sow it separately and make a note so it is easy to account for later.
Give both groups the same sowing depth, light and moisture when the packet directions allow. Two halves of a shelf can have quite different temperatures, especially if one is close to cold glass. Keep the trays together in comparable conditions. Write down how many seeds went into each group, when the first seedlings appeared and how many were up at the same later observation. An earlier first seedling and a larger number of seedlings are separate observations. A photograph of both groups on the same day can help you keep track as more seedlings come through.
Use the comparison to plan the rest of that packet. If both groups disappoint, check elapsed time, sowing depth and surface moisture. Try reserve seeds in clean materials, adjusting one likely cause.
Move the seed into its sowing cells
When the recommended cold period is complete, move the seeds into the prepared mix. If you can see a root tip, lift the seed with the little bit of loose medium around it where possible. Avoid pulling directly on the root. Set it into the prepared cell and follow the packet guidance for placement and covering. Keep the mix evenly moist with the tray drained. For the next stage, use the guide to growing lavender seedlings under cover.
In Ukrainian gardens, work back from a locally suitable planting window and the time you can provide good light under cover. A run of warm days may still be followed by spring frost. A raised bed and a low area in the same garden can dry at different speeds. Before setting plants out, check the forecast, introduce seedlings gradually to outdoor conditions and see whether rainwater drains from the intended position. If indoor light is limited and a suitable bed is available, consider the guide to sowing lavender outdoors.
Adjust the plan if the sowing space is delayed
Check the light, trays and available shelf space before chilling begins. When the glass gets cold at night, a steady shelf with adequate light may be a better choice. A separate lavender tray lets you check its mix and move early seedlings independently of vegetable seedlings.
If you have already started the cold treatment, arrange a protected place to sow on time. Seeds with a growing root should be planted when ready. If you have yet to begin, you can move the start date or buy a lot that has been prepared by the supplier. For an even border of a few matching plants, a nursery-grown cultivar is another option. When planning a larger bed from seed, estimate the final area using the number of young plants with well-developed roots. Keep a little planting space free for any seedlings that catch up later.
Feeding lavender once it has established outdoors
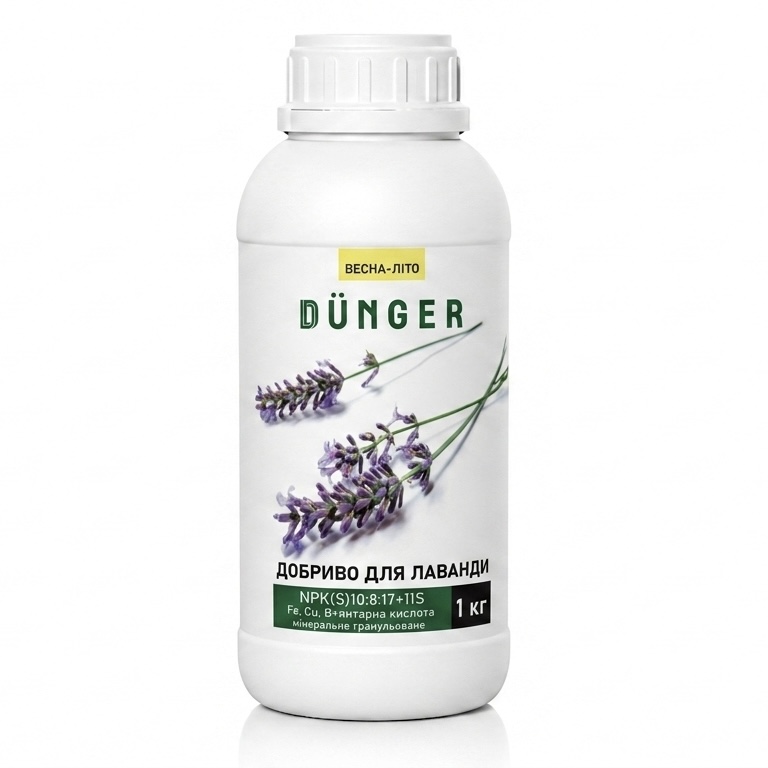
Complex fertilizer for lavender, granular
When lavender has established in the ground and a bed assessment shows a need for the nutrients in this formulation, consider DÜNGER lavender granules. Match the plant stage to the stated timing for soil application. Keep this method for the eligible outdoor planting, away from seeds in cold treatment or a seed tray.
Measure the planted area, calculate the required mass from the instructions and compare the 0.5 and 1 kg packs. Check the original photo, current price and selected option before ordering.
Lavender seed stratification questions
Store a dry packet as the supplier directs. For moist stratification, the seeds need contact with damp material at the appropriate temperature. Check whether the seed supplier has already prepared the batch for sowing.
For a method that calls for refrigerator conditions, use stable cooling without letting the damp material freeze. A simple thermometer can help you find the part of the refrigerator that matches the packet guidance.
Sow that seed in a separate labelled cell. Lift it carefully without forcing the root off the damp material. Check the remaining seeds and continue with the planned treatment when their condition allows.


